
A “granny at home” ADU is a self-contained, on-lot accessory dwelling unit built for an aging family member or as a rental income source. The fastest reliable path to occupancy: confirm your zoning, complete permit-ready drawings, line up financing, and hire a turnkey installer or permit-experienced contractor before you break ground. Skipping any one of those steps is where projects stall for months.
Your single most useful first action: call your local planning department, pull the zoning for your parcel, and request the ADU checklist. Most cities post it online. That document tells you setbacks, maximum square footage, owner-occupancy rules, and whether preapproved plan sets are available.
Key Takeaways
A granny pod ADU project succeeds when zoning, financing, and permit-ready plans are confirmed before construction begins.
| Point | Details |
|---|---|
| Check zoning first | Pull your parcel’s ADU rules before spending on design; setbacks and size limits vary by city. |
| Budget the full delivered cost | Detached ADUs run $180,000–$450,000 nationally; always add a 15% contingency from day one. |
| Secure permit-ready plans early | Complete drawings let lenders appraise as-completed value and cut plan-check time significantly. |
| Pick your financing path before construction | HELOCs, cash-out refis, and Fannie Mae renovation products each fit different equity and timeline situations. |
| Live Large™ turnkey option | Live Large™ handles design, permitting, financing coordination, and installation as a single bundled service. |
Table of Contents
- What type of granny pod ADU fits your lot and goals?
- What does the permitting process actually require?
- What does a granny pod ADU actually cost?
- How do you finance a granny pod ADU?
- Prefab, stick-built, or conversion: which build approach is right?
- What site and utility checks should you do before ordering?
- What does a realistic project timeline look like?
- How do you choose a provider and protect yourself in the contract?
- Worked example: 700-sq-ft detached ADU in Sacramento
- Why turnkey prefab reduces your permit and timing risk
- Live Large™ handles the full granny pod process for you
- Sources
What type of granny pod ADU fits your lot and goals?
The industry uses “ADU” (accessory dwelling unit) as the standard term. “Granny pod” or “granny flat” are informal names for the same thing. Five main types exist:
- Detached ADU: A freestanding unit in the backyard. Most flexible for aging-in-place design; typically $180,000–$450,000 nationally, with high-cost markets pushing higher. Requires the most site work.
- Attached ADU: Connected to the main house, sharing at least one wall. Faster utility tie-in; often $120,000–$300,000 depending on scope.
- Junior ADU (JADU): Carved from existing interior space (a bedroom or converted room). Lowest cost, often $40,000–$120,000, but size-limited (typically 500 sq ft max under California law and similar state rules).
- Garage conversion: Repurposes an attached or detached garage. Mid-range cost ($90,000–$220,000) with structural unknowns; adaptive reuse can be faster than new construction when the shell is sound.
- Prefab/modular/panelized: Factory-built or panelized units delivered to site. Predictable costs, faster construction schedule, and pretested plans that reduce permit correction cycles.
Decision rules: Lot size and setbacks determine whether a detached unit is even legal. Utility distance drives cost more than most buyers expect. If the goal is aging-in-place, a detached or attached unit gives you the floor plan control to add zero-step entries and wide doorways. If speed and budget predictability matter most, prefab or panelized wins.
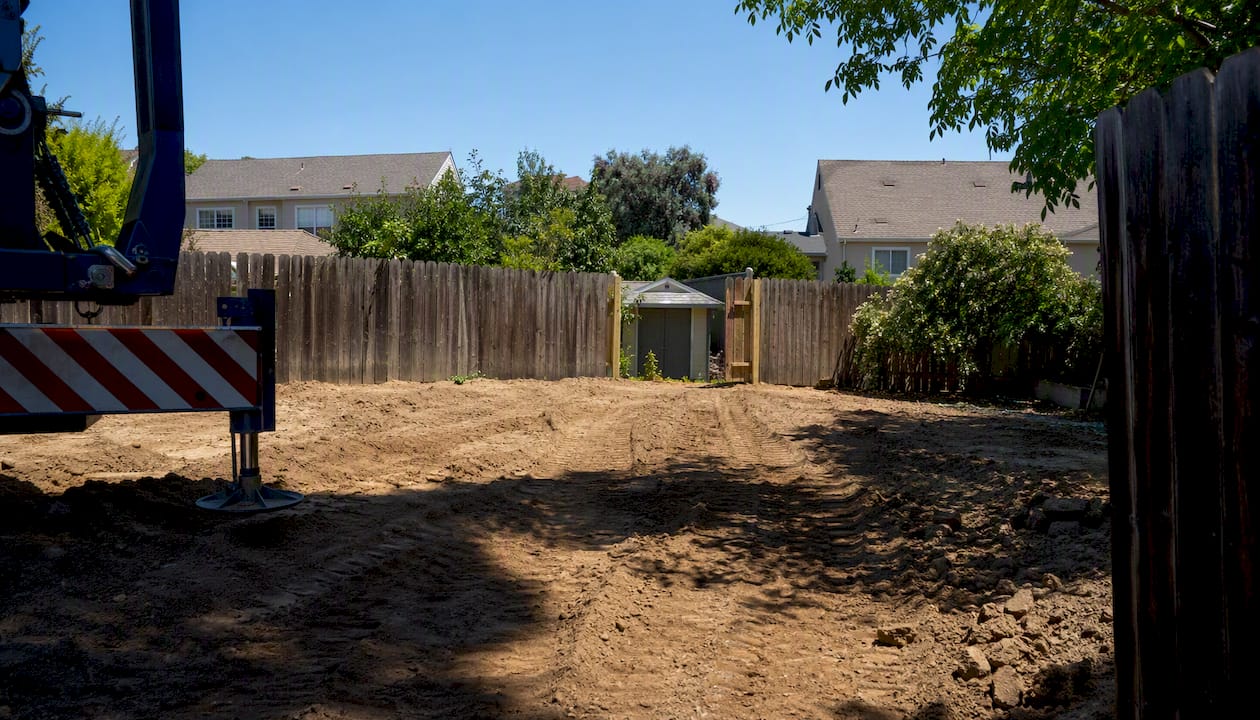
Pro Tip: Before ordering a prefab unit, confirm your lot’s crane or truck access. A unit that can’t be delivered without removing a fence or utility line adds cost and time that the factory quote never includes.
What does the permitting process actually require?
Permits are where most ADU projects lose weeks or months, and the cause is almost always an incomplete submission. Cities typically won’t begin plan review until the application is 100% complete.
A standard permit package includes: a site plan showing lot lines, setbacks, and existing structures; floor plans and elevations; structural calculations; energy compliance documentation (Title 24 in California, for example); a contractor agreement; proof of worker’s compensation insurance; and any jurisdiction-specific forms (owner-builder declarations, sprinkler exemptions, fire protection plans). Boston’s ADU permitting guidance is a useful model: it requires a long-form building permit with all documents finalized before submission, and its appeal window runs 45 days with associated fees.
Beyond the building permit, expect separate permits for electrical, mechanical, plumbing, foundation, and fire protection. Each trades permit triggers its own inspection.
Permit timelines typically run 6–14 weeks from application to approval in most U.S. markets, and combined permit-related costs commonly range $3,000–$15,000 depending on state and city rules. One meaningful shortcut: preapproved plan sets can move review to roughly 20 days in some jurisdictions versus 60 days under standard plan check. California (Gov Code 65852.22), Oregon (HB 2001), and Washington (HB 1923) all include shot-clock provisions that cap review time once a complete application is filed.
Pro Tip: Have your contractor or a permitted design professional file the application. An owner-filed submission with a single missing document resets the waiting period in most cities. One correction cycle can cost you four to six weeks.
What does a granny pod ADU actually cost?
Detached backyard ADUs nationally range $180,000–$450,000; garage conversions run $90,000–$220,000; junior ADUs fall between $40,000 and $120,000. A 10–20% contingency is standard. Here is how a mid-range 700-sq-ft detached ADU budget typically breaks down:
| Line Item | Typical Range | Notes |
|---|---|---|
| Permit & plan review fees | $3,000–$15,000 | State/city caps apply in CA, OR, WA |
| Impact & utility connection fees | $5,000–$15,000 | Distance to mains is the main variable |
| Design & engineering | $8,000–$15,000 | Lower with preapproved or prefab plans |
| Foundation & site prep | $15,000–$40,000 | Soil conditions and slope drive this |
| Construction hard costs | $120,000–$300,000 | Prefab/panelized can compress this range |
| Utilities (sub-meter vs. new service) | $500–$5,000 | Sub-metering is far cheaper than new service |
| Contingency (15%) | $20,000–$50,000 | Budget this from day one |
Top cost drivers to watch:
- Utility distance to water, sewer, and electric mains
- Soil conditions requiring engineered foundations
- Impact fees, which vary dramatically by city
- Change orders during construction (avoid with a fixed-price contract)
How do you finance a granny pod ADU?
Most ADU projects in 2026 still rely on homeowner equity. The dominant paths are HELOCs, home-equity loans, and cash-out refinances, with renovation loans, construction-to-permanent products, and ADU second-lien programs rounding out the toolkit.
- HELOC / home-equity loan: Fastest to close if you have sufficient equity. Flexible draw structure. Best for homeowners with 20%+ equity who want to control construction timing.
- Cash-out refinance: Replaces your first mortgage. Works well when current rates are favorable; less attractive when rates are high.
- HomeStyle Renovation / construction-to-permanent: Fannie Mae’s Selling Guide products allow these loans to purchase, renovate, or add an ADU to a one-unit property. Draws are released in phases as construction milestones are met.
- ADU second-lien / local programs: Some cities and states offer low-interest gap funding or predevelopment cost reimbursement. Boston and California HCD both have programs, though availability changes and must be verified with the administering agency.
Construction loans typically release funds in 3–4 draws over 6–12 months, with each draw tied to an inspection milestone. Lenders increasingly count ADU rental income in underwriting when borrowers provide permit-ready plans, a realistic rental schedule, and a property management plan. Without documentation, most lenders exclude that income entirely.
Pro Tip: Finish your permit-ready drawings before you apply for financing. Lenders need an “as-completed” appraisal to structure draws, and an appraiser can’t value what isn’t drawn. Getting plans done first shortens underwriting by weeks. For a deeper look at which path fits your equity position, ADU financing options for homeowners walks through each route.
Prefab, stick-built, or conversion: which build approach is right?
Each approach has a different risk profile, not just a different price tag.
Prefab/panelized units arrive with pretested plans, factory quality control, and a predictable construction schedule. Permit friction drops when the manufacturer has already worked with local jurisdictions. The tradeoff: site-specific foundation and utility work still adds cost, and delivery logistics can be complicated on tight urban lots.
Stick-built custom construction gives you full design flexibility and works well on complex sites where a prefab can’t be craned in. It takes longer and costs more to manage, and the permit process starts from scratch every time.
Garage conversions are often the lowest-cost path, but structural surprises (inadequate footings, no vapor barrier, substandard framing) can erase the savings quickly. An adaptive reuse ADU makes sense when the shell is genuinely sound.
For aging-in-place, the accessibility checklist matters regardless of build type:
- Zero-step entry (no threshold at the front door)
- 36-inch clear doorways throughout
- No-threshold shower with a fold-down bench
- Grab bars in bathroom (or reinforced walls for future installation)
- Lever-style door and faucet handles
- Single-floor layout with simplified circulation
Pro Tip: When comparing prefab quotes to stick-built bids, add foundation, utility connections, delivery, and crane costs to the factory price. The delivered-and-connected number is the only fair comparison.
What site and utility checks should you do before ordering?
Before committing to a design or signing a contract, walk the lot with a tape measure and a few key questions:
- Where are the lot lines, easements, and recorded setbacks? A survey confirms this; don’t rely on a plat map alone.
- What is the distance from the proposed ADU location to water, sewer, electric, and gas mains? Every extra foot of trenching adds cost.
- Does the lot have sewer access or septic? A failing septic system can block an ADU permit entirely.
- What is the panel capacity at the main house? A new ADU often requires a panel upgrade or sub-panel.
- Sub-metering is far cheaper than installing a new separate utility service. Costs range from a few hundred dollars for sub-metering up to $5,000 or more for a full separate service or transformer work.
- Is there crane or truck access for a prefab delivery? Trees, overhead lines, and narrow gates all matter.
Soil borings or a geotechnical report are typically required when the site has visible slope, fill history, or expansive clay soils. Budget $2,000–$5,000 for a geotech report if there is any doubt.
What does a realistic project timeline look like?
The standard ADU sequence runs: feasibility → design and permit-ready drawings → plan check and permit issuance → foundation and utilities → framing and rough trades → finishes and inspections → certificate of occupancy.
| Phase | Typical Duration |
|---|---|
| Feasibility and site check | 1–3 weeks |
| Design and permit-ready drawings | 2–6 weeks |
| Plan check and permit issuance | 6–14 weeks |
| Foundation and utilities | 3–6 weeks |
| Framing and rough trades | 6–12 weeks |
| Finishes and final inspections | 4–6 weeks |
| Certificate of occupancy | 1–3 weeks |
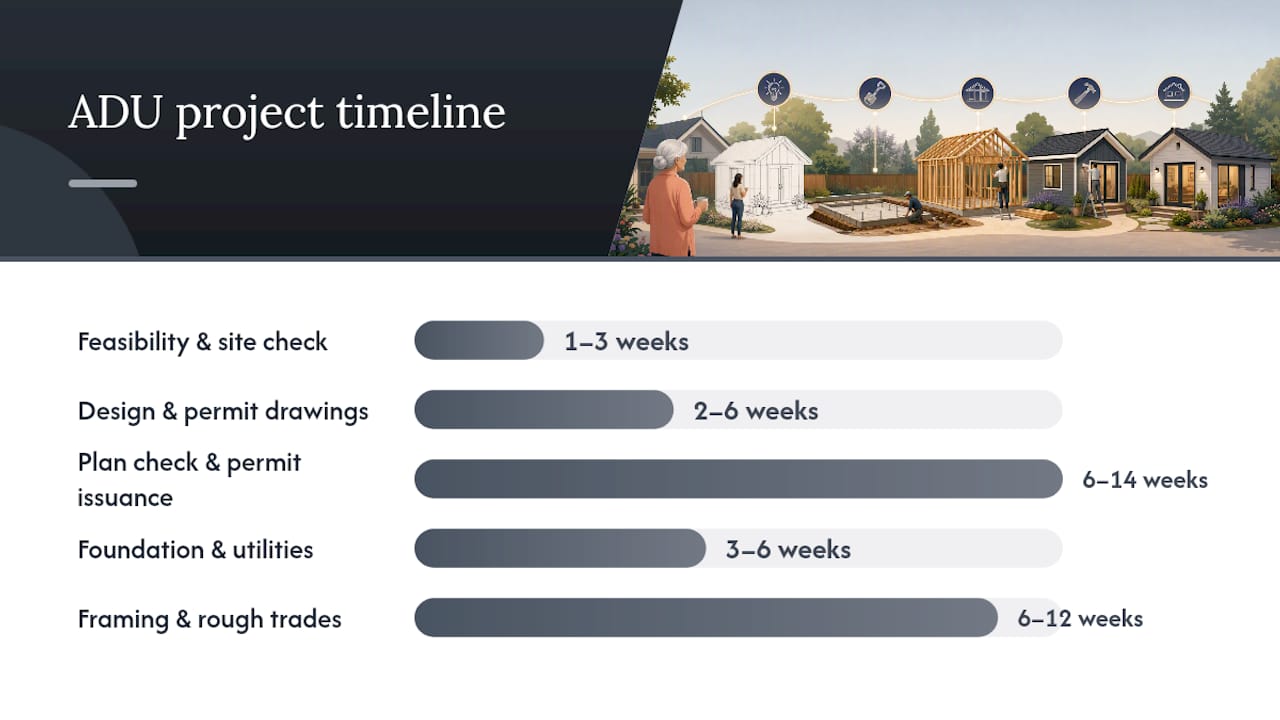
Total: roughly 9–18 months from first site check to move-in, depending on jurisdiction and build type.
Key sequencing notes:
- Lenders can begin underwriting while plan check runs, but most require a permit or completed draw milestone before releasing funds.
- Final inspections for electrical, plumbing, and mechanical happen before the building department issues the CO.
- Prefab and panelized builds compress the framing phase significantly, often cutting 6–10 weeks from the construction schedule.
How do you choose a provider and protect yourself in the contract?
Provider criteria worth checking before you sign anything: state contractor license (verify on your state’s licensing board), general liability and workers’ comp certificates, documented ADU permit experience in your county, local references from projects with similar site conditions, and a portfolio that includes the permit type you need (detached, conversion, or JADU).
Contract checklist:
- Fixed-price vs. cost-plus (fixed-price protects you from scope creep)
- Milestone-tied draw schedule aligned with lender requirements
- Clear permit filing responsibility (who files, who pays correction fees)
- Change-order rules with written approval required before work proceeds
- Warranty terms for structure, systems, and finishes
- Insurance and indemnity language naming you as additional insured
Red flags: no local references, vague scope of work, resistance to milestone payments, refusal to provide stamped structural plans, or a request for more than 10–15% upfront before permits are issued.
Pro Tip: Ask every candidate: “Have you pulled an ADU permit in this city in the last 12 months?” A contractor who has never navigated your specific building department is learning on your project.
Worked example: 700-sq-ft detached ADU in Sacramento
Assumptions: 7,000-sq-ft lot, standard R-1 zoning, no variances required, utility connections within typical distance for a Sacramento infill lot.
Timeline highlights for this scenario:
- Weeks 1–4: feasibility, site survey, design kick-off
- Weeks 5–12: permit-ready drawings completed; plan check submitted
- Weeks 13–22: plan check runs (Sacramento uses a shot-clock; preapproved plans can accelerate); lender underwrites in parallel
- Weeks 23–30: foundation poured, utilities trenched, prefab panels delivered and set
- Weeks 31–44: rough trades, finishes, inspections
- Week 45–48: final inspection, CO issued, occupancy
Draw schedule for a construction loan on this project would typically release funds at foundation completion, framing/delivery, rough-in inspections, and final CO.
Why turnkey prefab reduces your permit and timing risk
The conventional wisdom says “get multiple bids and manage the process yourself.” That works fine when you have construction experience and time. For most homeowners adding a granny pod, the real risk isn’t the cost of the unit. It’s the six months lost to a correction cycle on a permit application, or a contractor who has never navigated your city’s ADU checklist.
A turnkey workflow collapses those risks. When one team handles design, permit filing, financing coordination, and construction, the plans are already calibrated to what the building department expects. Correction cycles drop. Draw schedules align with what lenders actually require. And when something goes sideways on site, there’s one phone call, not three.
The tradeoff is less customization at the margins. But for a 700-sq-ft aging-in-place unit where the goal is occupancy, not architectural novelty, that tradeoff almost always pays off.
Live Large™ handles the full granny pod process for you
Getting a granny pod from concept to occupancy means coordinating zoning research, permit-ready drawings, lender underwriting, site prep, construction, and final inspections. Most homeowners underestimate how many handoffs that involves.
Live Large™ bundles every step: design, permit filing, financing assistance (including HELOC guidance and construction draw coordination), turnkey installation, and optional property management for investors. The turnkey ADU development model means one point of contact from feasibility through your certificate of occupancy, with pretested plan sets that reduce permit correction cycles and lender relationships already familiar with ADU underwriting. Whether you’re housing a parent or adding a rental unit, get started with Live Large™ to see what’s possible on your lot.
Sources
- Accessory Dwelling Units (ADUs) | Fannie Mae
- Permitting your accessory dwelling unit
- Doineedapermit
- Everything you need to know about paying for an ADU | Press Herald