
Pick the layout your room width actually allows, then build everything else around three fixed priorities: code-verified clearances, right-sized appliances, and floor-to-ceiling storage. That order matters. Homeowners who start with cabinet color or a Pinterest board before checking dimensions almost always end up redesigning mid-build.
Before you sketch anything, grab a tape measure and find your waste stack, your vent wall, and every doorway swing. Those fixed points decide which layouts are even possible in your accessory dwelling unit. Everything downstream, from where the sink lands to whether an island fits, follows from that first walk-through.
A few anchors are worth trusting as you plan:
- NKBA-style clearance guidelines recommend a work aisle width that is comfortable for one or two cooks.
- Permit realities specific to ADUs, because most jurisdictions treat them as permanent residential units
- Live Large™’s own ADU floor plan guidance for translating a lot’s constraints into a buildable layout
Key Takeaways
Successful ADU kitchen design depends on matching layout to room width, verifying NKBA-style clearances, and right-sizing appliances before finish selection begins.
| Point | Details |
|---|---|
| Measure fixed points first | Locate the waste stack, vent wall, and door and window swings before choosing a layout. |
| Match layout to width | Use a galley at 7 to 9 feet; save islands for rooms near 13 feet wide. |
| Verify clearances on paper | Check 42 to 48 inch aisles and landing dimensions with appliance doors open. |
| Plan appliances and circuits early | Confirm panel capacity for the fridge, range, and dishwasher before ordering. |
| Work with a turnkey team | Live Large™ handles design, permitting, and installation as one coordinated ADU kitchen process. |
Table of Contents
- ADU Kitchen Layout Options: Which One Fits Your Footprint?
- How Do You Fit Enough Storage Into a Small ADU Kitchen?
- Which Appliances and Ventilation Choices Work Best in ADUs?
- What Materials and Finishes Work Best in a Small ADU Kitchen?
- What Permits and Inspections Apply to an ADU Kitchen?
- What Clearances and Dimensions Should You Verify Before Ordering Cabinetry?
- How Should You Use Inspiration Photos to Plan Your ADU Kitchen?
- How Live Large™ Approaches ADU Kitchen Design
- The Layout Advice Nobody Wants to Hear
- Let Live Large™ Build Your ADU Kitchen From Plan to Install
- Sources
ADU Kitchen Layout Options: Which One Fits Your Footprint?
Every ADU kitchen boils down to one of five shapes, and the room’s width usually makes the decision for you before style even enters the conversation. The five standard layout archetypes are single-wall, galley, L-shaped, U-shaped, and island or peninsula, and each one has a width range where it stops working well and starts fighting the room.
- One-wall. Everything runs along a single wall, which makes it the default for studios and very narrow ADUs. It also cuts plumbing and electrical runs to a minimum, since the sink, range, and fridge all sit on one line instead of spreading across two.
- Galley. Two parallel runs facing each other, ideal at 7 to 9 feet of width. This layout delivers the best storage-to-footprint ratio of any option on this list, because you get counter and cabinet space on both sides without wasting a square foot on circulation you don’t need.
- L-shaped. Two walls meeting at a corner, and the most flexible option for open-plan ADUs. It scales gracefully. A tight L works fine in a small unit, and a wider one can absorb a small island once the room opens up.
- U-shaped. Three walls of cabinets and counters, which maximizes storage and prep space but demands roughly 10 feet of width or more to avoid feeling like a cockpit.
- Island or peninsula. The layout everyone wants and the one most likely to backfire. Islands genuinely need about 13 feet of total room width to leave working clearance on all sides. Below that, a peninsula or a rolling cart captures most of the social and prep benefits without choking foot traffic.
Why this number matters: a 13-foot width threshold isn’t a soft suggestion. It’s the point where a fixed island stops being a workspace and starts being an obstacle you walk around every day.
Designers consistently point out that function beats style in tight footprints. Layout and clearance decide whether a kitchen actually works, while finish choices are closer to the last five percent of the decision. If your ADU footprint is under 13 feet wide and you’re set on an island anyway, expect to fight the layout for the life of the unit. A peninsula gives you a similar prep surface and seating edge while keeping the aisle open on the far side.
How Do You Fit Enough Storage Into a Small ADU Kitchen?
Storage capacity in a compact kitchen comes from height and hardware, not square footage you don’t have. The single highest-leverage move is running cabinets straight to the ceiling instead of stopping at the standard 12 or 18 inches of dead space above. That reclaimed zone, paired with pull-down shelving or a rolling step stool, turns wasted air into usable pantry space.
From there, the details compound:
- Pullout pantries and narrow vertical rakes slot into gaps as slim as 6 inches, capturing space a standard cabinet run would waste.
- Toe-kick drawers add a thin layer of storage at floor level, perfect for baking sheets or step stools you rarely need at eye level.
- Full-extension drawers beat swing doors for pots and pans, since you can see and reach the back of the drawer without kneeling.
- Deep drawers work better than upper cabinets for stacked plates, and dedicated peg or divider inserts keep lids and utensils from becoming a drawer full of clatter.
- Open shelving looks great in photos, but closed cabinetry holds up better in a rental-capable ADU where grease, dust, and turnover between tenants matter more than aesthetics.
Outlet placement deserves its own line item in your plan. Small-kitchen strategies that work well include reserving a dedicated appliance niche, so a coffee maker or toaster oven has a permanent outlet-equipped spot instead of colonizing your one clear stretch of countertop. If you’re outfitting a closet or pantry nook alongside the kitchen, a partner resource like home organization systems can help you extend the same vertical storage logic into adjacent spaces.
Pro Tip: Measure your tallest stored item, whether that’s a stand mixer box or a stack of sheet pans, before you finalize drawer depth. Cabinet showrooms default to standard depths that rarely match what people actually own.

Which Appliances and Ventilation Choices Work Best in ADUs?
Right-sizing appliances is where most ADU kitchen budgets either stretch further or quietly blow up. A 24 to 30 inch range or cooktop handles real cooking without eating the aisle clearance a full-size 36-inch unit demands, and induction cooktops shrink the footprint further while simplifying ventilation requirements compared to gas.
Drawer dishwashers and compact 24-inch refrigerators solve the narrow-footprint problem without forcing you into a mini-fridge that can’t hold a week of groceries.
- Permanently installed cooking appliances typically pass inspection without issue; portable or plug-in cooktops frequently do not, since most jurisdictions evaluate ADU kitchens as permanent residential spaces rather than accessory setups.
- Ducted range hoods remain the first choice for ventilation wherever the framing allows it; high-performance recirculating hoods are a reasonable fallback when ducting isn’t possible, but they need careful filter selection and sizing to actually clear cooking odors near a neighboring unit.
- Dedicated circuits for the refrigerator, range or cooktop, and dishwasher aren’t optional extras. Confirm your panel has the capacity for all three before you finalize appliance selections, not after.
What Materials and Finishes Work Best in a Small ADU Kitchen?
Material choices in a small kitchen carry more visual weight than they would in a larger room, since there’s less space to dilute a bold pattern or a busy grain. Quartz countertops remain the most common ADU choice for durability against renters and daily wear, and high-quality laminate is a legitimate budget-friendly alternative that performs well if you’re not pushing the project cost ceiling.
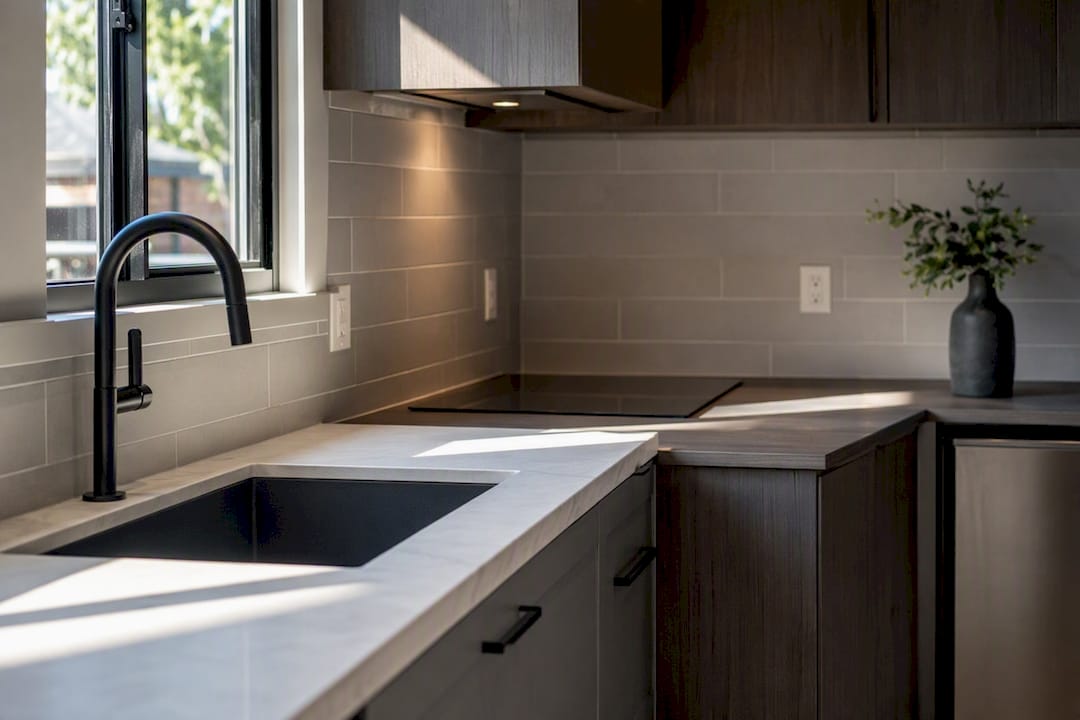
Cabinet color strategy matters more than the cabinet brand. A continuous run of light-toned cabinetry, without a mix of upper and lower finishes breaking up the sightline, reads larger than the same square footage split across two colors. Designers pushing small-kitchen tactics generally favor this uninterrupted approach specifically because it removes visual stopping points in a room where every stopping point registers as smaller.
Flooring continuity across the ADU’s living and kitchen areas does the same visual trick from a different angle: no transition strip, no color break, just one surface that reads as one room. It also simplifies installation and cuts material waste, which matters on a tight budget.
- Backsplash choices should add height and depth, not competition. A single vertical tile line or a large-format slab backsplash draws the eye up without fragmenting the wall the way a busy mosaic pattern can in a room this size.
- If you’re building the ADU as a short-term rental, durability and cleanability outrank trend-chasing. Live Large™’s short-term rental setup guide covers finish choices built for turnover, not just first impressions.
What Permits and Inspections Apply to an ADU Kitchen?
An ADU kitchen isn’t a kitchenette in the eyes of most building departments. It’s a full residential kitchen subject to full residential code, and that distinction shapes nearly every design decision above.
- Expect your jurisdiction to require a permanently installed cooking appliance, a full sink with both hot and cold water, and electrical and ventilation systems that meet residential code, not accessory-use exceptions.
- Plug-in cooktops and other temporary appliances are a common reason ADU kitchens fail final inspection. Plan for a permanently wired or plumbed installation from day one instead of treating it as a placeholder.
- Coordinate panel capacity, dedicated circuits, and ventilation duct routing during schematic design, not after cabinets are ordered. Early electrical coordination avoids the expensive mid-project rework of moving a range location because the circuit wasn’t where you assumed.
- If your ADU shares utility service with the main house, confirm subpanel and meter-sharing rules with your local authority early. That answer often determines where the panel and circuits can physically live.
Raise every permit question with your contractor or designer at the schematic stage, and get written approval on file before you order anything with a long lead time, especially custom cabinetry or a specialty range.
What Clearances and Dimensions Should You Verify Before Ordering Cabinetry?
Every number below comes from NKBA-style planning standards, and every one of them should be checked against your actual drawn plan, not eyeballed, before a single cabinet order goes in.
The number that trips up the most plans: islands generally need close to 13 feet of total room width to keep that 42 to 48 inch clearance intact on every working side, a threshold drawn straight from NKBA planning figures. Skip that check and an island that looked great on paper turns into a hip-bruiser in the finished room.
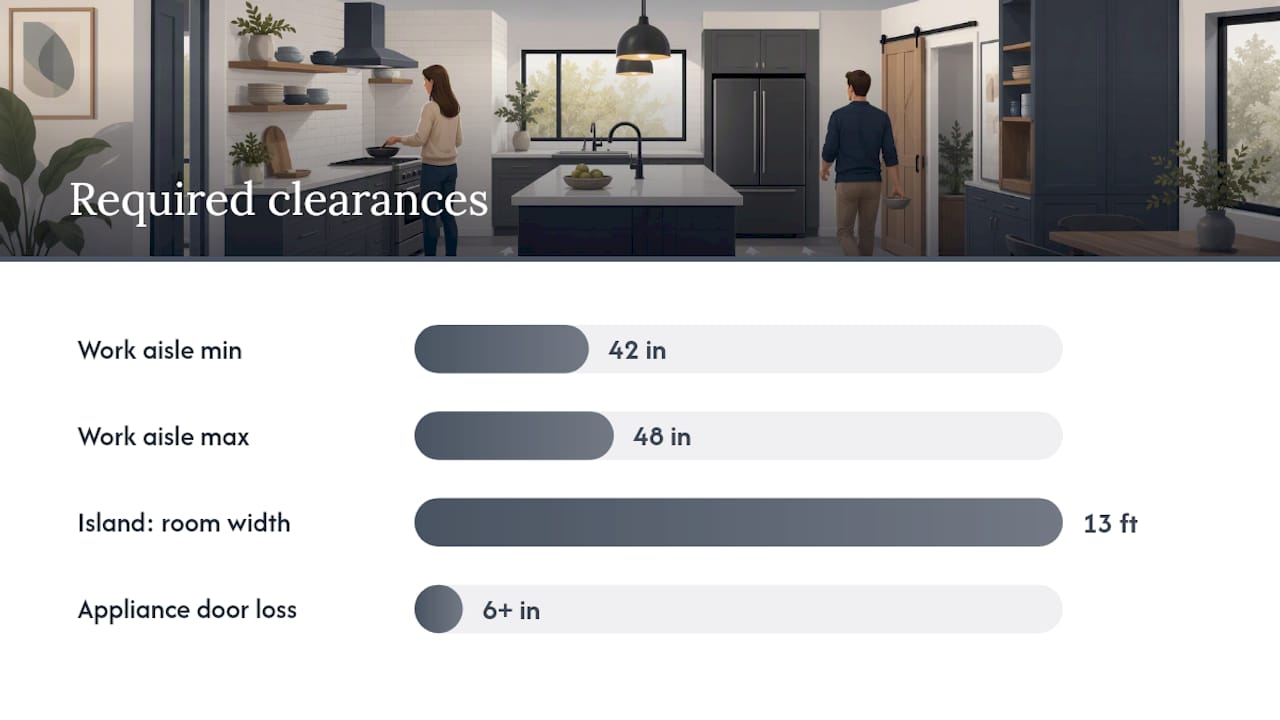
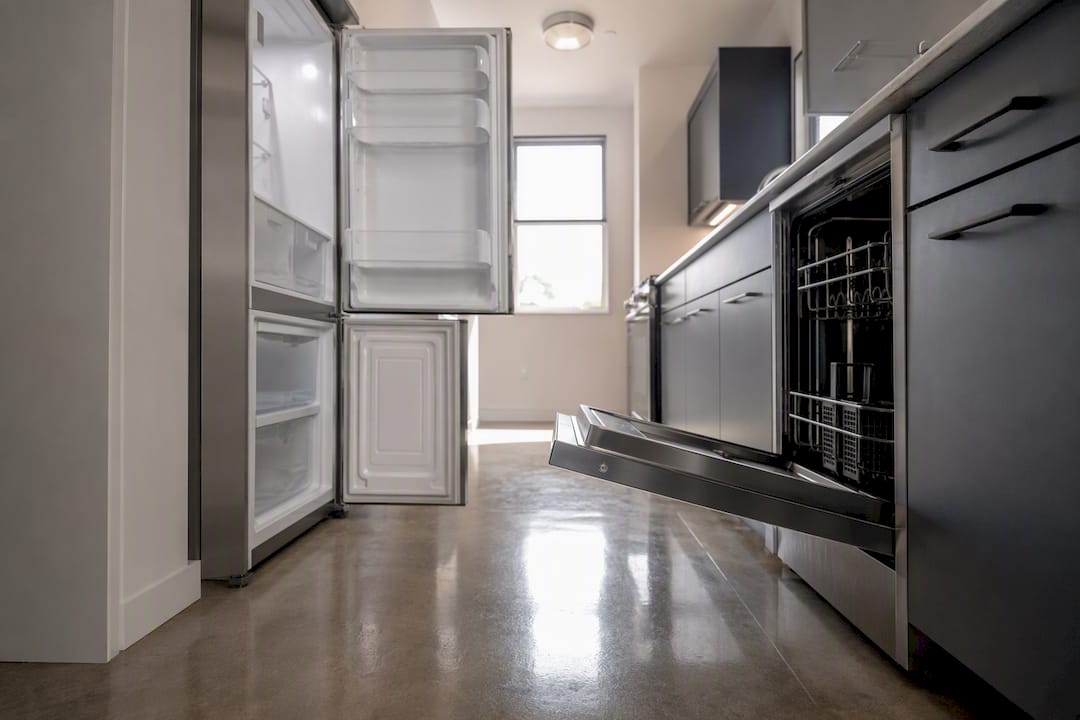
Measure every aisle from the face of the cabinet or appliance, handles included, and confirm the clearance with appliance and cabinet doors open, not closed. A refrigerator or dishwasher door swung fully open can eat six or more inches of an aisle that looked fine on a flat floor plan.
How Should You Use Inspiration Photos to Plan Your ADU Kitchen?
A photo only becomes useful once you translate it into numbers. Look at any image you’re saving and pull out four things: the approximate footprint it’s showing, the appliance sizes visible in the shot, which of the five layout archetypes it’s built on, and the finish palette driving the look.
Annotate the photos you like most with simple notes: an arrow marking “this cabinet height” or a circle around “this hardware finish.” That turns a vague mood board into something a contractor can actually price and build.
- Builder portfolios and professional design galleries tend to show buildable layouts with real dimensions behind them.
- General style galleries are useful for color and material inspiration but rarely reflect the clearance realities of a small ADU footprint.
- Before committing to any photo-driven idea, run it against your own site plan: check the waste stack location, the vent wall, and every door and window swing first, exactly as you did before choosing a layout in the first place.
How Live Large™ Approaches ADU Kitchen Design
Live Large™ builds every ADU kitchen around the same sequence, because skipping a step is where most redesigns start.
- Measure the fixed points: waste stack, vent wall, doorway and window swings.
- Choose the layout that width and those fixed points actually allow.
- Confirm NKBA-style clearances and panel capacity before appliance selection.
- Right-size appliances and ventilation to the confirmed layout.
- Order and install, with permit documentation already on file.
The most common fix Live Large™ makes on incoming plans is downsizing an island the room can’t support, either into a peninsula or a mobile cart, and catching electrical panel shortfalls before appliances are ordered instead of after.
A kitchen plan that skips the clearance check on paper almost always gets the clearance check in the field, at a much higher cost to fix.
The Layout Advice Nobody Wants to Hear
Homeowners fixate on appliances and finishes because those are the fun decisions. Layout and clearance are the boring ones, and they’re also the ones that decide whether the kitchen actually works five years from now. That’s the gap in most ADU kitchen advice: plenty of photo inspiration, not enough insistence on measuring first.
The island obsession is the clearest example. Everyone wants one because every renovation show features one, but a huge share of ADU footprints simply don’t have the 13 feet of width to support it without choking the walkway. A peninsula solves the same social and prep problem in most cases, and it doesn’t require pretending your 10 foot wide kitchen is 13 feet wide.
If you take one thing from this playbook, take this: measure the fixed points before you fall in love with a layout. Confirm the clearances before you order cabinets. Right-size the appliances to the room you actually have, not the room you saw in a magazine. The style decisions are real, but they’re not the decisions that make or break a small kitchen.
— Rudy
Let Live Large™ Build Your ADU Kitchen From Plan to Install
Live Large™ is the alternative to piecing together an ADU kitchen through separate designers, permit runners, and subcontractors: one team handles design, permitting, appliance and spec selection, construction, and turnkey installation under a single project timeline.
A first consultation covers your lot’s fixed points, the layout your width actually supports, and a realistic sequence from design through permitting, build, and install, so you know the shape of the project before committing to it. Live Large™’s interior design service for small ADUs covers exactly the storage, finish, and clearance decisions this article just walked through, applied to your specific footprint rather than a generic template. If you’re weighing a full turnkey build against managing trades yourself, the ADU turnkey development model explains how that single-team process works end to end. Reach out to start a design consultation and get your fixed points, layout options, and appliance sizing mapped before you order anything.
Sources
- How to Design a Kitchen Layout (With Real NKBA Numbers)
- Types of kitchen layouts
- Small ADU Kitchen Ideas & Requirements
- Kitchen Layout Principles: The Contractor’s Guide to Functional Design – ArchKit Design